Servo v2 is a debug device in the Servo family. It is no longer manufactured, but still frequently used for early bringup or in cases where JTAG/SWD is needed.
Though Servo boards are not publicly distributed or sold (by Google), detailed information is available:
Stop by your local Chromestop.
In a typical debug setup, you connect Servo v2 to the debug header on a Chrome OS device, and to a host machine through the HOST_IN USB port.
Modern Chrome OS mainboards connect to Servo v2 with a 50-pin “Yoshi” flex cable. The schematic and layout for this cable is also available. The standard DUT-side debug header is an AXK750347G from Panasonic, though shorter variants are sometimes used.
The basic steps to connect Servo v2 are:
You should be able to use the power button on Servo v2 to power the Chrome OS device on and off.
Follow the general using Servo instructions.


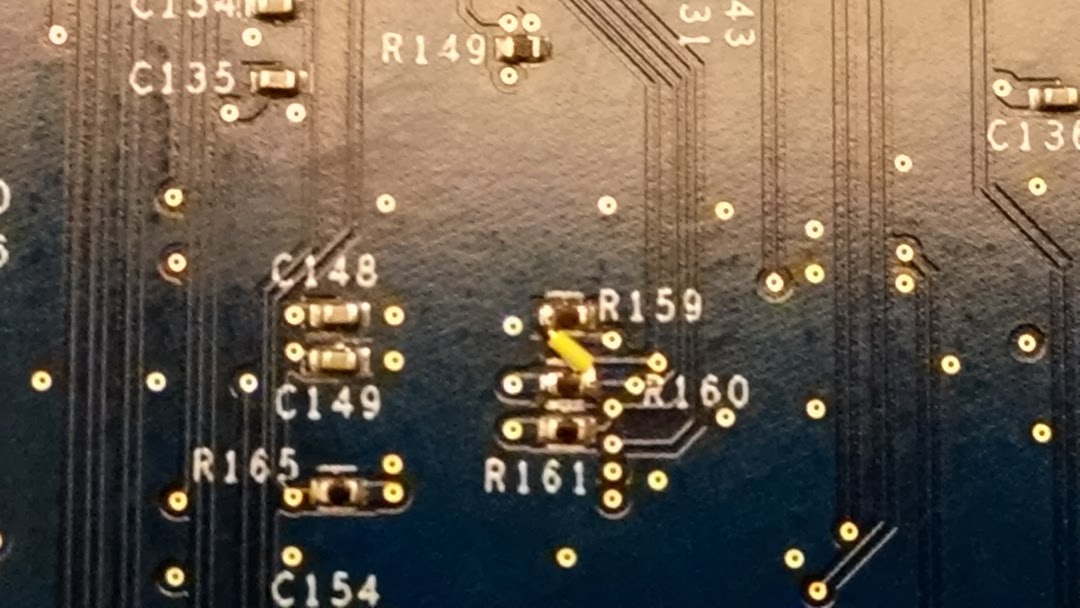
Servo v2 reworks are needed to flash the PD MCU on certain boards and access the PD MCU console. These reworks are not mutually compatible, so only apply the one relevant to your board.